Gaz's Gear: Bar Setup
Gaz's Gear: Outback Communications | Outback Power | Outback Preparation | Kia and Towing | Home Bar Setup

So you've been Pub Trailing, and seen some really great bars in your travels. So now you want one for home, right?
There's more to this bar making than meets the eye. I suppose that's why there are so many specialty bar-builders out there.
Why a Bar?

Finished bar under the verandah
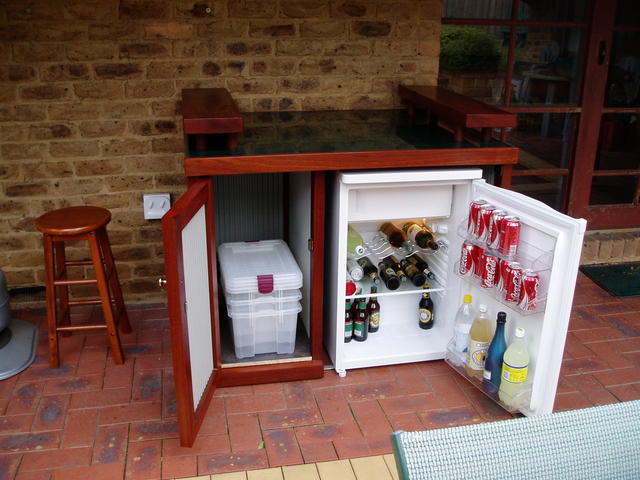
Practical storage for outside entertainment
Will it be inside, outside, in the shed for the lads or a showpiece in your mansion? Will it be used a lot or just a storage unit tucked away in the corner? Lots of questions.
We embarked on making a bar for the back verandah, to allow us to enjoy spending more time out around the BBQ or enjoying the great outdoor life that Australians do.
Rather than just a beer fridge, we chose to make it a practical unit that four people can sit around, under cover, and have everything they want close to hand - not just the beverages, but also a functional area for laying out some platters or even cooking up some nice focaccias whilst enjoying an ale!
What's more, we wanted it to basically extend the patio area seating so that if a crowd was around, the bar could provide additional seating for people, who were still congregated around the main outdoor tables and chairs furniture.
And, for blokes who just love any opportunity to justify the need to buy some new tools for the workshop, we decided the design would use mortice and tenons to really show off the seamless jointing, and allow us to invest in a nice router table.
What a great project. What's more, at the end, you can look forward to enjoying any fine ale of your choosing right outside your own back door.
But don't be fooled, you'll still want to go and enjoy all those great Oz Pubs in our Pub Trailing trips!
Some of our tips and tricks are outlined in this article.
Happy glueing and screwing as they say in the woodworking world!
Gaz!
Gary Pope
www.GdayPubs.com.au
p: 0408994799
PS: If you want some inspiration - why not check out some of the Pubobilia in the Pub Related Trivia of www.gdaypubs.com.au - plenty of ideas in there!
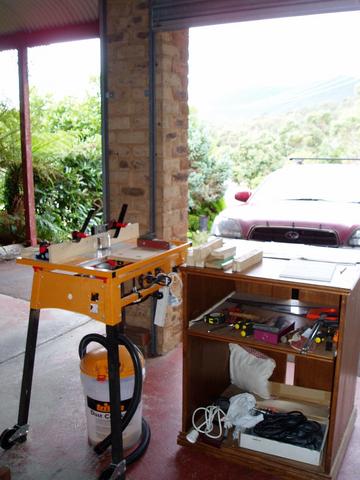
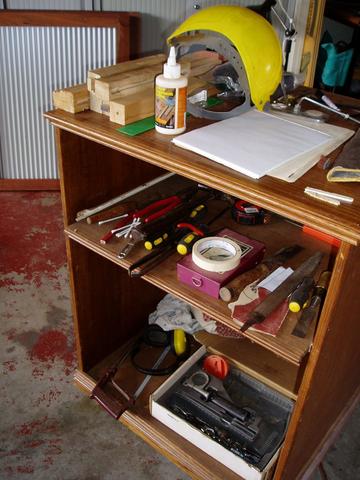
Getting ready to build
Rulers, L-squares, hand saws, chisels, drills, tape measures - keep them close for quick access.

Mortice and Tenon considerations
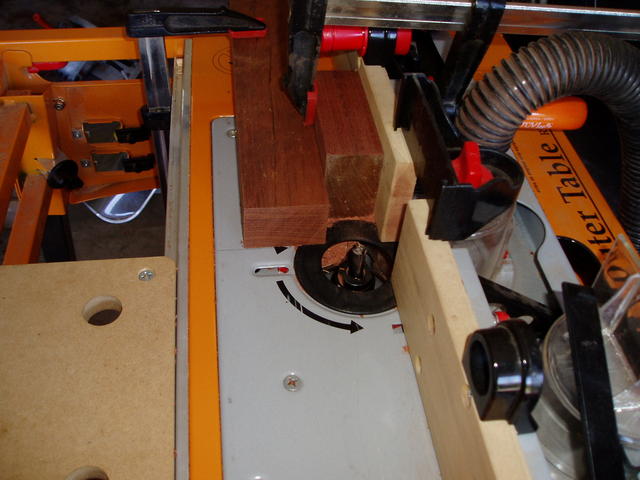
Jigging up the router table to make the tenons
Time to get all the tools out.
For this project, apart from the usual assortment of woodworking tools, the essentials were a router, a bench saw, and heaps of quick release G-clamps.
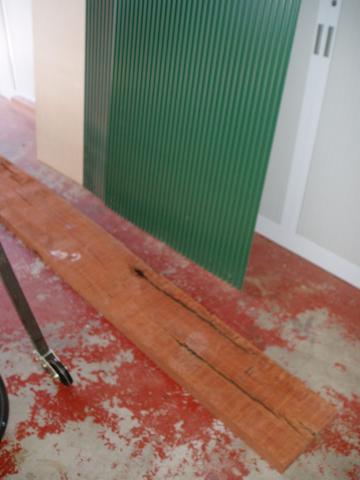
- the secret is to get good timber - I used Jarrah
- be sure to cut all your timber dead square
- measure twice and cut once!
- pre-fit
- practice on some offcuts to prove your design.
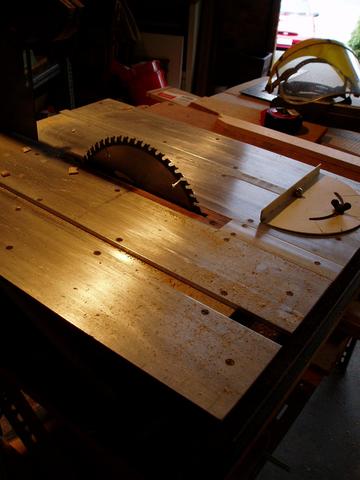
Fine tooth, sharp tungsten tipped saw blades (say 60 tooth) - makes cutting a dream.
Consider a rollaround tool trolley - another project to make!
Cutting steel would have to be the most dangerous part of the project - espeicially when working with cutting disks in portable power tools.
Tools and Toys!
Making the bar is one thing. For this project, I wanted to experiment with the art of mortice and tenon joints, so that I could end up with no visible signs of framework joining. It was also a great opportunity to get some new tools and try some new techniques - in this case a Router table.
TIP: Get some experimental pieces, and have a go at making some sample cuts and joints to see how all the equipment operates, before you go cutting into your special materials for the job.
Safety considerations
I was fortunate enough to have a reasonable workshop to layout all the material and leave it from weekend to weekend to come back to. These assembly projects can take some space! But in confined spaes, playing with saws and routers becomes a great safety consideration.
So don't forget to look after yourself.
- dust extraction
- face mask or shield
- no loose clothing, particularly around routers and bench saws.
- eye and ear protection
Remember, you want to enjoy this project when it's finished!
Getting the Materials
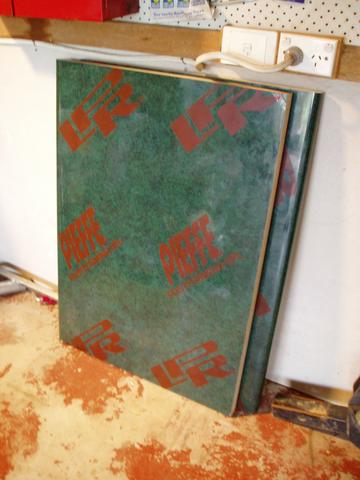
A kitchen benchtop, halved and joined makes an ideal work surface for the finished bar.
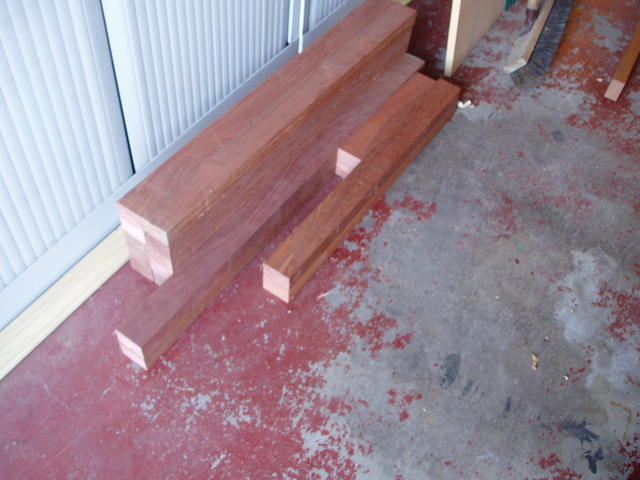
Featured Jarrah timber framing works out not much more expensive than basic materials.
Mini-Corri makes a great feature for cladding material on a bar. And a huge array of colors are available.
Give some thought to the theme of your bar.
Some people simply want the bar to be functional. Of course, it would be nice for it fit into the decor your home, yard, shed, outdoor setting or whatever it is going to be part of.
Generally speaking, a bar can become quite a focal point. People will gather there to get another refreshment. So why not make it more than just a place to sit and store your drinks? We chose to make this bar an accessory to the outdoor entertainment area - a place to not only store the drinks, but to also lay them out when doing a wine-tasting, and to put out some platters of cheese'n'greens and nibbles.
So the selection of materials must compliment this. For instance, if the house has corrugated iron roofing and verandahs, consider using miniature corrugated sheeting as a material for the walls of the bar. Select a color scheme of timber and cladding that will exentuate the appearance of the bar - making it a focal point.
Materials
Here's the materials used on this bar, which measures: 1220 wide, 850mm deep and 1180mm tall overall.
- Benchtop (32mm Formica)
- 34mm x 5mm Jarrah edging for bechtop
- 60mm x 30mm Jarrah Cleating over fridge
- 60mm x 40mm Jarrah framing for left wall,
right wall, rear wall, cupboard door
and centre wall and base connections.
- hidden styled hinges for storage cupboard
- brass door knob
- casters for rolling the unit around
- Colorbond Mini-Corry 2.4m Cottage Green sheeting for cladding
- Wattyl Estapol sealants for finishing
- Shellawax finish for the bar slabs
- 70mm (approx) redgum slab bar tops
- Bar fridge that holds a selection of beer, wine, soft drink and champagne
Approximate cost of materials, and fridge: Under $1000.00.
cost of tools and the dozen weekends building it? Priceless!
TIP: We suggest you start with the fridge.
Depending on what you like to drink, it is amazing the range of unconventional sized bottles there are. For a start, most beer stubbies are all different heights. Then there's champagne bottles that are really fat. Finally, beware of wasted space when laying containers down in a fridge. You can lose half a shelf! It is really worth the time to go and test out putting a range of different sized beveridges into the fridges on the market these days.
We compared about a 20 different models, and found a combination that fitted about twice the refreshments inside, for the same cost and outside measurements!
So build your bar around the fridge!
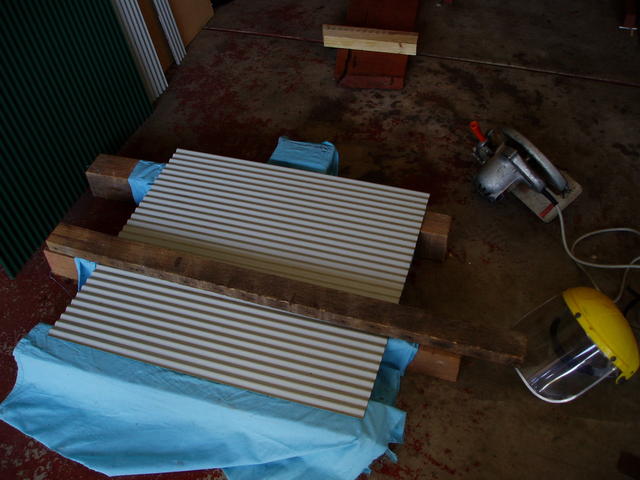
Assembling and reviewing
Clamping before glueing, really helps assembly work.
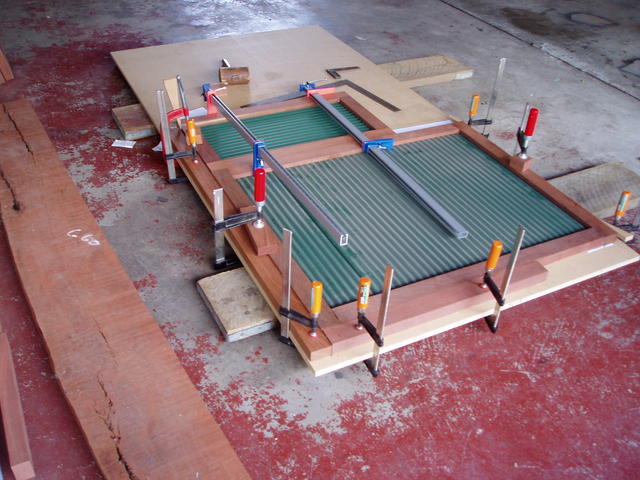
Laying each panel down flat and square when glueing.
turning up a better solution for the bar stands.
Always be prepared to review!
Patience is something I am well known to be short of when it comes to working on a project in the shed! But this time, the project wreally warranted being done right.
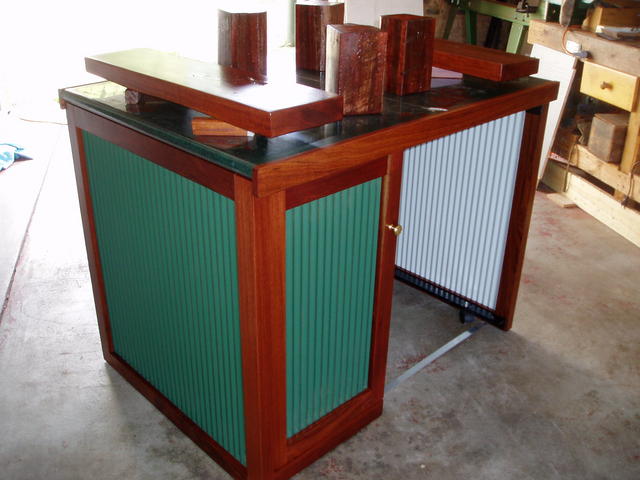
Of ten, original ideas on paper, just don't look right when they emerge in reality. Such was the case on this bar. For nostalgic reasons, the idea was to try and incorporate some fine 125x125mm post material into the frame of the bar slabs.
But despite the workload of cutting, sanding and finishing these posts, they plainly didn't fit into the overall design.
So, it was back to the drawing board, to turn up (literally) some nice small round jarrah connection posts to hold the redgum slab bar to the surface.
The moral of the story? Don't glue it, CLAMP IT! Then you can pull it apart and have another go, if things don't work out as you originally expected.

Some special considerations
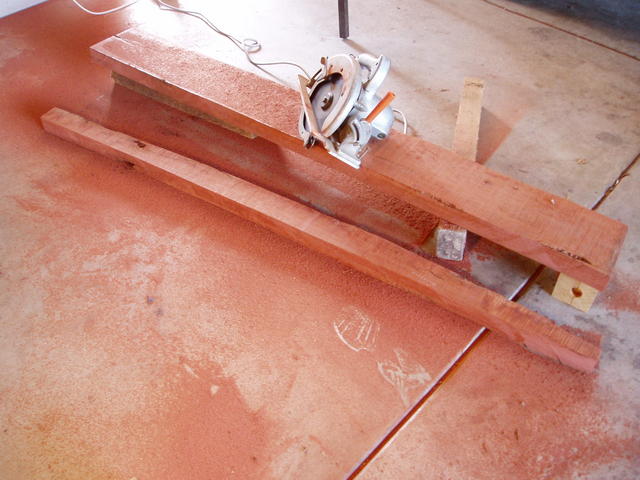
Cutting the bar top is a dusty exercise!
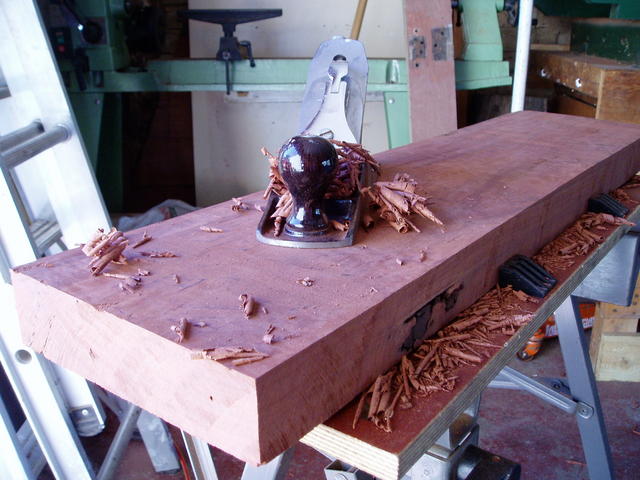
Use a plane to get the bulk of the slab levelled.

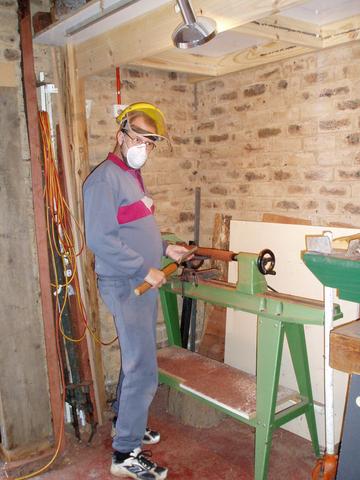
Working up a thirst!
Bar top - the showpiece!
In my opinion, nothing beats a nice solide dark timber colored rustics bar top! To compliment the jarrah, I chose good old Australian Redgum.
Actually this piece was the offcut from a mantlepiece I built out of quite a large slab some years back.
- use a really sharp course blade saw
- get ready for a heap of redgum dust going everywhere
- don't skimp on sanding to a nice finish.
- set your job up on a decent workstand so you don't wreck your back all day sanding
- be well stocked up on a variety of sand-paper grades - canvas backed is best!
Get ready for some serious sand-papering. Start off with a plan to knock over the bulk of the levelling of the slab. I belt-sanded the selected pieces from about 100 to 200 to 300. Then I hand sanded from 480 to 600 to 800 grit. I would have almost stopped at that point until a friend there on the day sai: "You'd be really annoyed one day if you looked back and realised you didn't go all the way to 1000 and 1200"..... So: another hour or so brought the finish up to reaaaal smooth. No regrets!
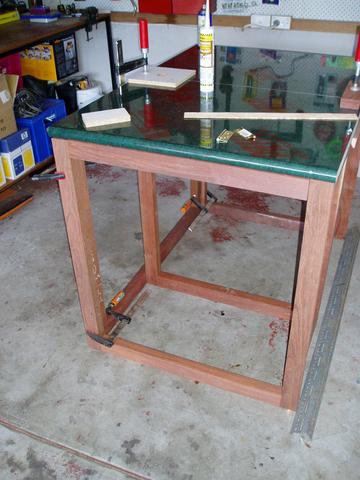
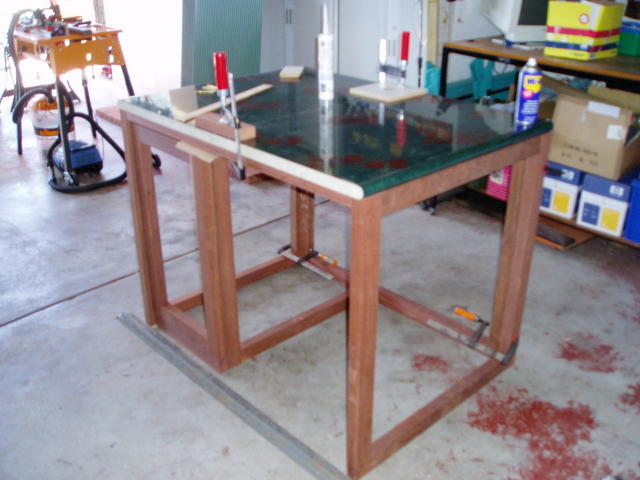
Kitchen rolled edge bechtops halved and butted make a beaut top!
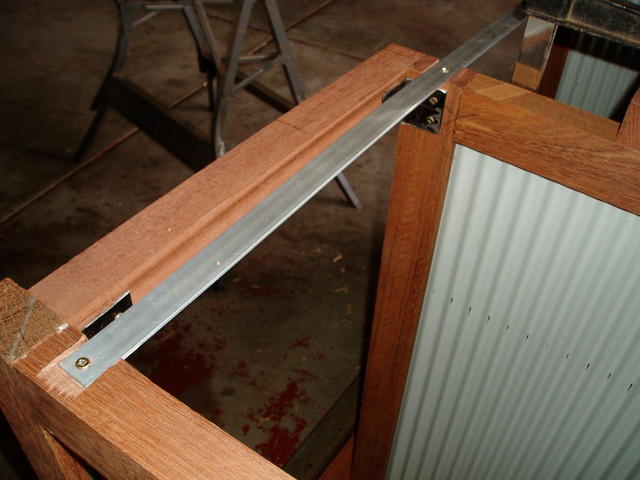
Rebating a steel band to strengthen the base where the fridge will later fit over.
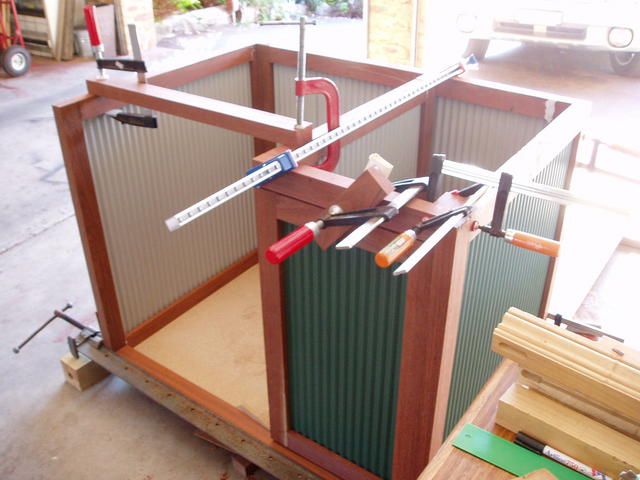
Flip the unit upside down to work more easily on the inside (not glued yet! - so more clamps!)
The top surface - water proof and cleanable
The thing about bars, especially outdoor bars, is they get wet from glasses and bottles, and dusty from the elements.
- Consider using kitchen bench offcuts - great for cleaning
- build a design to take advantage of rolled edges
- Keep the protection plastic on the material until job completion
- design your project around the size of the benchtop
- make the benchtop useful
- have a separate area to lean on as a "bar"
Make the benchtop both a surface and a structural component of the project. Build around it, and then turn the project upside down (protecting the future surface) to gain easy access to assembling the lower and base frames and hardware.
Getting the fridge in and out
Heaven forbid the fridge ever fails and lets your beer get hot in the future! But sooner or later, you 'll be wanting to get your fridge out of the unit, for servicing or cleaning. So don't fence the bar fridge in.
But then there is the issue of people leaning all over the bar - particularly the side wall that houses the fridge. A simple solution, is to rebate a flat aluminium (non rusting!) strap across the front opening of where your bar fridge will be housed. This allows the fridge to be extracted (over the thin hand) - but provides a necessary support to the side wall.
Finishing off and moving it!
..... What did you forget?
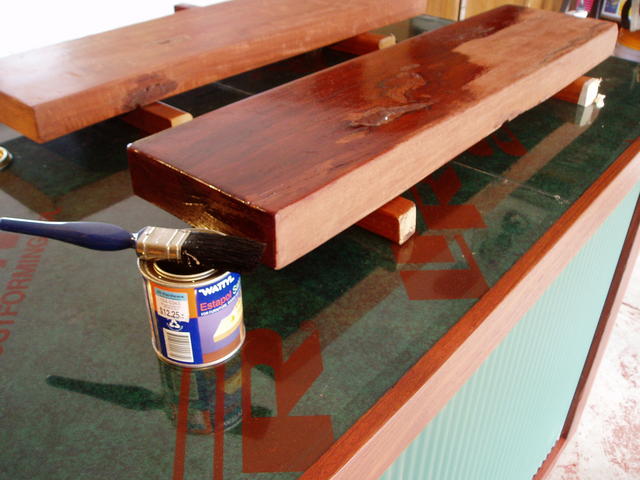
Applying the sealants
Checking it all out before moving it to its final resting spot.
Dusty environments not good for laquering!
When finishing off, be sure to dust down not only the job itself, but the area around the job. There's nothing worse than finding embedded dust particles in your well sanded handiwork after the sealant is applied.
Also, now is the time to finally remove any plastic covering that was protecting any of the benchtops or cladding all this time. You don't want to go sealing them in place as well.
Now that you've glued the unit, give it a little time to really cure. You and your mates are sure to be bumping this unit around in the years to come, so let it set nice and secure before moving it.
Now if you've built an over engineered, heavy Jarrah based unit like this one, be sure to have some strong mates around on the day you have to move it.
- Did you remember to design it with door way and gate clearances in mind?
- Have you considered how to lift and move such a piece of furniture of this size and weight?
- Will you have enough refreshments to pay back the favour of asking all the lads to help you move it?
Just don't scratch it carrying it from the workshop to where it is going to be put on display tonight!
Ah! Time to enjoy the unit.
.... and look after it too!

Enjoying the finished product
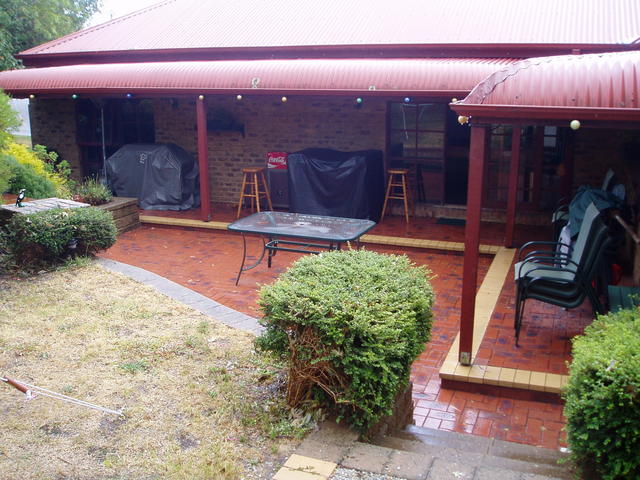
Get a cover for those wet days!

Just go and enjoy it!
All in all, a very satisfying project - so time to celebrate and christen the bar with a good scotch (or what ever takes your fancy).
The one addition to consider for an outside unit, is a cover for protection from rain and dust. Be sure to get one that is easy to remove, so that your bar is ready for use with a minimum of fuss. We chose a slide over type unit that we got made to order from a local upholsterer - with wool proector on the inside, and waterproof vinyl on the outer.
We hope you enjoy making (or buying) your Home Bar, and that some of our experiences and tips will give you a bit of a head start for thinking about how to enclose that great Aussie Icon - the bar fridge!
I think its time to go and enjoy an ale after this lot! Actually, with all the time spent in the workshop lately on this project, maybe its high time for a bit of a break away to another one of our great Oz Pubs in our Pub Trailing trips!
Cheers!
Gaz!
Gary Pope
www.GdayPubs.com.au
p: 0408994799
NOTE
These articles in Gaz's Gear, are independently presented in good faith, to help travellers who want to enjoy some really great Pub Trail journeys giving some extra thought to being best prepared to get the best from the experience.
Opinions, comments and technical content presented here are for general reader interest only, and in no way should be construed as any representation, guarantee or association whatsoever with any companies, products or services mentioned as examples or by inference. Readers should strictly observe all manufacturer and reseller recommendations, instructions and all operational requirements provided with any products purchased or used.